
How to Seal Your Windows Like a Pro: A Comprehensive Guide for Homeowners

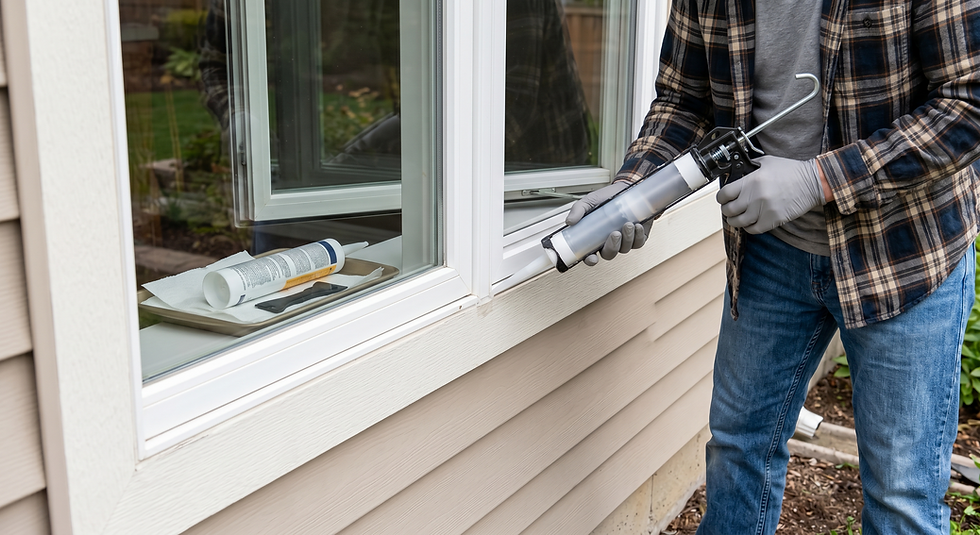
Nothing ruins the curb appeal of a home faster than a messy, peeling line of caulk around a window. But keeping your windows sealed isn't just about looks, it's one of your home’s primary defenses against hidden water damage, drafts, and uninvited pests.
If you're staring at a cracked joint and wondering whether you can handle the fix yourself this weekend, you're in the right place. Sealing a window like a pro isn't difficult, but it does require the right material and a specific technique.
Quick Answer: How to Silicone a Window (and How Often to Do It)
To get a flawless, weatherproof seal, scrape away the old caulk completely and clean the area with isopropyl alcohol. Lay down a steady, continuous bead of high-quality 100% silicone (use low-modulus for exteriors) at a 45-degree angle, then smooth it down immediately with a gloved finger or a tooling spatula.
Plan to inspect your exterior window seals once a year. Depending on how brutal your local weather is, you’ll usually need a total reapplication every 5 to 10 years.
What Silicone Does
Think of window silicone as your home’s frontline defense against the elements. Ignoring cracked or peeling seals isn’t just an aesthetic issue - it invites some expensive headaches:
Stops Water Damage: Small gaps let wind-driven rain seep straight into your walls. Over time, that hidden moisture breeds toxic mold and rots out your home's wood framing.
Helps Reduce Energy Bills: Drafty windows act like tiny chimneys, letting your expensive climate-controlled air escape. Properly sealing them locks the temperature in and keeps your HVAC system from working overtime.
Keeps Pests Out: Bugs don't need a wide-open door. Tiny perimeter gaps are essentially an open invitation for ants, termites, and spiders to move right into your walls.
Choosing the Right Material: What Type of Silicone Do You Use?
Using the wrong sealant is one of the most common DIY blunders. For window perimeters, the choice comes down to which side of the glass you’re standing on.
The Exterior: 100% Silicone
For the outside of your home, 100% silicone sealant is the gold standard. It stays permanently flexible, completely waterproof, and won't shrink or crack under a brutal sun. When you’re at the hardware store looking at tubes, keep three things in mind:
Look for "Low-Modulus": This is just industry speak for "extra stretchy." It allows the sealant to expand and contract alongside your home’s natural shifts without tearing away from the window frame.
Grab "Neutral Cure," not Acidic: Acidic-cure silicone smells like strong vinegar and can actually corrode vinyl or aluminum frames over time. Neutral cure is odorless and safe for every material.
Check for UV/Mildew Inhibitors: Make sure the label explicitly states it’s rated for exterior use so it doesn't yellow or degrade in the sun.
Note: If you want to dive into the official building codes for moisture tracking, the U.S. Department of Energy keeps a detailed breakdown on their Building America Solution Center.
The Interior: Siliconized Acrylic Latex
While you can technically use 100% silicone inside, it’s usually a bad idea for typical living spaces. Pure silicone is notoriously difficult to smooth down, has a high-gloss texture, and is entirely unpaintable.
The Better Option: For indoors, buy a high-quality siliconized acrylic latex caulk. It gives you a bit of that silicone moisture resistance but uses an easy-to-apply latex base. It cleans up with plain water, tools beautifully, and can be painted over to perfectly match your trim or drywall.
Step-by-Step Guide: How to Seal a Window Like a Pro
Step 1: Strip the Old Stuff and Prep the Surface
A fresh bead of silicone won't stick to old, peeling caulk. Grab a utility knife or a specialized caulk removal tool to scrape away the old material down to the bare surface. Once it’s cleared out, wipe down the frame and the wall with isopropyl alcohol. This gets rid of residual oils, dust, and microscopic debris that ruin adhesion. Just make sure the surface is 100% dry before you move on.
Step 2: Use Painter’s Tape for Clean Lines
If you want that crisp, professional look instead of a smeared mess, don't skip this step. Run high-quality painter’s tape along both sides of the joint - one strip on the window frame and another on the siding or drywall. This perfectly maps out your gap and makes cleanup incredibly easy.
Step 3: Cut the Nozzle at a 45-Degree Angle
Cut the plastic tip of your tube at a 45-degree angle. Start with a small cut near the tip; you can always widen it if your window gap requires a thicker bead. Pop the tube securely into your caulking gun.
Step 4: Apply Consistent Pressure
Hold the gun at a 45-degree angle to the joint. Squeeze the trigger with steady pressure and move at a continuous pace along the seam. The goal is to pull the gun smoothly so the caulk fills the gap evenly without leaving empty pockets or huge bulges.
Step 5: Smooth It Out (Tooling)
Immediately after laying down a line, you need to "tool" it to seal the bond.
For Inside (Latex): Simply dip your finger in a bit of water and smooth it down.
For Outside (Silicone): Water won't work on pure silicone. Instead, use a dry, gloved finger, a profiling tool, or a finger dipped in a little soapy water to smooth the bead flat against both surfaces.
Step 6: Peel the Tape Early
Don't wait for the sealant to dry to pull the tape. Remove it immediately while the bead is still wet. Pull the tape away at a 45-degree angle to leave behind a perfectly sharp, clean line. Let it cure fully based on the manufacturer’s directions before exposing it to heavy moisture.
How Often Should You Reapply Silicone?
While high-quality pure silicone sealants are incredibly tough, they don’t last forever. On average, exterior window silicone stays fully effective for 5 to 10 years. However, its actual lifespan depends entirely on what it has to deal with. If your windows face brutal afternoon sun, intense freezing cycles, or constant driving rain, the sealant will break down a bit faster.
Signs It’s Time for a Do-Over
You don’t need to wait for water to start leaking into your living room to know there's a problem. Take a walk around your house once a year and look for these red flags:
Visible Cracking or Splitting: The silicone is drying out and losing its flexibility.
Peeling Away: If the bead is lifting off either the window frame or your siding, moisture is already getting behind it.
Discoloration or Mold: Stubborn black spots that won't wash off mean mildew has taken root underneath the sealant.
If you spot any of these, don't just layer new caulk over the top. Grab your putty knife, scrape it clean, and follow the steps above to give your windows a fresh, weatherproof seal that will last for years to come.
Additional Tips for Maintaining Your Windows
Regular Inspections
Regular inspections are crucial. Make it a habit to check your windows at least once a year. Look for any signs of wear and tear. Early detection can save you from costly repairs down the line.
Cleaning Your Windows
Keep your windows clean. Dirt and grime can accumulate and may cause the sealant to break down faster. Use a gentle cleaner and a soft cloth to wipe down the frames and glass.
Consider Seasonal Changes
Be mindful of seasonal changes. Extreme temperatures can affect the integrity of your sealant. If you live in an area with harsh winters or scorching summers, you may need to reapply more frequently.
Wrapping Up: Trust the Experts
Properly sealing your windows isn't just about making them look sharp, it’s your home’s first line of defense against sky-high energy bills and costly water damage. While tackling a window or two makes for a great weekend DIY project, sealing an entire house requires a steady hand, the right materials, and a lot of patience.
If your window seals are peeling, you're feeling a draft, or you are looking to upgrade your home’s efficiency with high-performance window replacements, you don't have to figure it out alone.
The team at XP Windows and Doors is here to help. Based in Orange, CA, we proudly serve homeowners all across Orange County, specializing in flawless weatherproof installations and structural architectural openings that keep the elements exactly where they belong - outside.
Ready to secure your home? Contact XP Windows and Doors today to schedule an on-site consultation or request a professional assessment for your next window and door upgrade!


Comments